Get in Touch with Us!
.png)
Delve into the importance, types, installation methods, and maintenance of camper slide out toppers and camper awning brackets, ensuring you make an informed decision when choosing and using them.
Camper slide out toppers and camper awning brackets are essential components for RV owners looking to enhance their vehicle’s functionality and protect it from external elements. With the increasing popularity of RV travel, these components have become vital in ensuring comfort, safety, and durability during camping trips. This guide delves into the importance, types, installation methods, and maintenance of camper slide out toppers and camper awning brackets, ensuring you make an informed decision when choosing and using them.
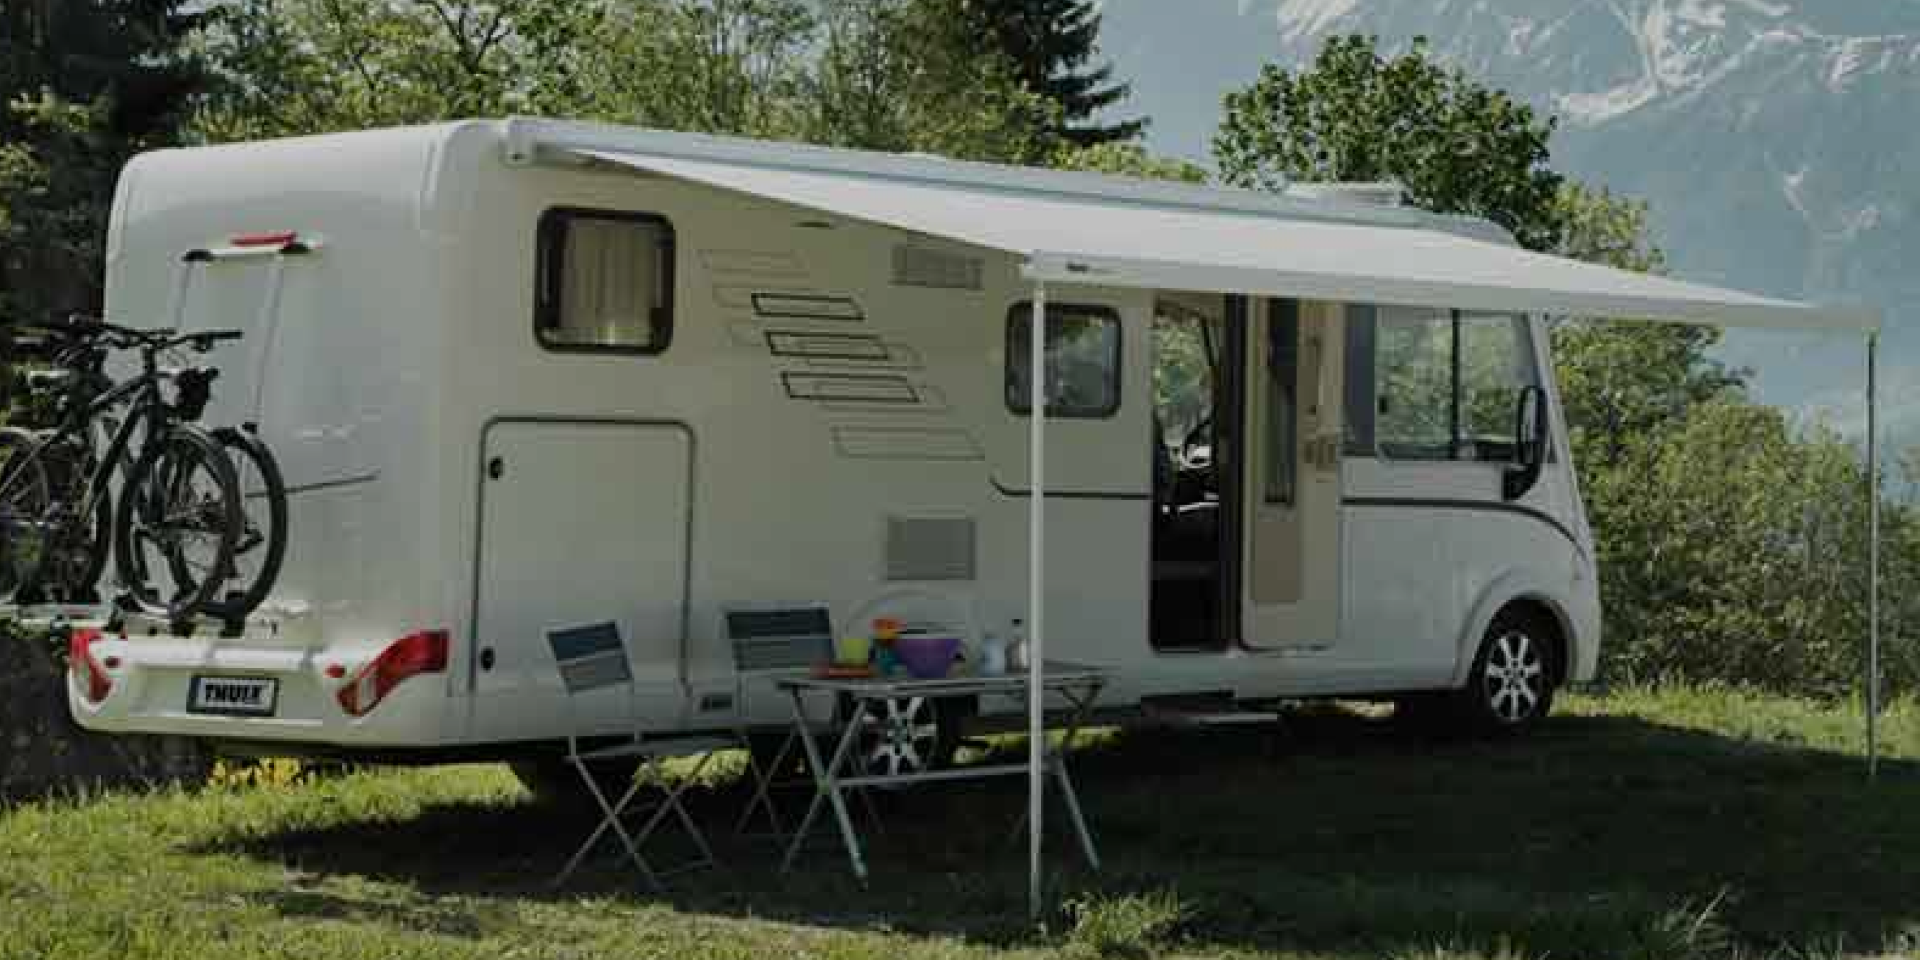
Camper slide out toppers are specially designed awnings that cover the slide-out section of an RV. When the slide-out is extended, the topper provides a protective cover, preventing debris, rainwater, and sunlight from directly impacting the slide-out roof. This not only prevents potential leaks and structural damage but also helps maintain a stable internal temperature by reducing direct sunlight exposure.
Camper slide out toppers come in a variety of sizes, materials, and styles, allowing RV owners to select the best fit based on their specific slide-out dimensions and usage requirements. Additionally, they can be either manually operated or motorized, providing different levels of convenience and control.
Protection from Debris: A slide out topper effectively prevents leaves, branches, bird droppings, and other debris from accumulating on the slide-out roof, reducing the risk of clogging and potential water damage.
Water Protection: By shielding the slide-out roof from direct rainfall, the topper minimizes water pooling, which could lead to leaks, mold growth, and structural damage. Water-resistant materials like vinyl or acrylic are particularly effective in preventing moisture penetration.
UV Protection: The topper also serves as a barrier against UV rays, preventing sun damage to seals, rubber gaskets, and other exposed components. This helps maintain the structural integrity of the slide-out over time.
Temperature Regulation: During hot weather, the topper provides a layer of insulation, reducing heat transfer into the RV and keeping the interior cooler. This can also reduce the load on the air conditioning system, resulting in energy savings.
Enhanced Aesthetic Appeal: Slide out toppers can be customized to match the RV’s exterior, creating a cohesive and polished appearance while adding functional value.
Manual Slide Out Toppers: These toppers require manual extension and retraction, making them a more budget-friendly option. However, they may require more effort to operate, especially for larger slide-outs.
Electric Slide Out Toppers: Powered by a motor, electric toppers can be extended and retracted at the push of a button. They provide greater convenience, especially for RV owners with multiple slide-outs or those with limited mobility.
Retractable Slide Out Toppers: Designed to be retracted when not in use, these toppers minimize wind resistance and prevent damage during travel. They are ideal for RVers who frequently move from one campsite to another.
Size Compatibility: It is crucial to measure the slide-out dimensions accurately to ensure the topper provides adequate coverage. Consider the width, depth, and length of the slide-out, accounting for potential overhangs.
Material Durability: Vinyl and acrylic are the most common camper awning materials used in slide out toppers. Vinyl is highly resistant to water and UV rays, making it ideal for wet climates, while acrylic is more breathable and suitable for hot, dry regions.
Ease of Installation: Some toppers come with DIY installation kits, while others may require professional installation. Consider the complexity of the installation process and the tools required.
Brand and Warranty: Reputable brands offer extended warranties and robust customer support, ensuring long-term reliability and protection against manufacturing defects.
Required Tools and Materials: Drill, measuring tape, ladder, sealant, and mounting hardware. It is also recommended to have a second person assist during installation to ensure proper alignment.
Step-by-Step Process:
Safety Tips: Always use a sturdy ladder and wear protective gear during installation. Avoid installing in high winds or wet conditions.
Understanding Camper Awning Brackets
Camper awning brackets are designed to provide structural support for awnings, ensuring they remain stable during use. These brackets can be installed on the side walls, roof edges, or slide-outs of the RV, depending on the awning type and intended use. Properly installed brackets distribute the weight of the awning evenly, preventing undue stress on the RV’s frame.
Standard Brackets: Basic support brackets designed for lightweight awnings. They are typically made of aluminum or steel and are suitable for smaller awnings.
Adjustable Brackets: These brackets allow for height and angle adjustment, making them ideal for uneven terrains or adjustable awning systems.
Heavy-Duty Brackets: Constructed from reinforced materials, these brackets are designed to support larger, heavier awnings and withstand high wind conditions.
Weight Capacity: Verify that the bracket can handle the weight and length of your awning. Heavy-duty brackets are recommended for larger awnings.
Material Strength: Look for rust-resistant materials like powder-coated aluminum or stainless steel to ensure longevity.
Compatibility: Ensure that the bracket design aligns with the specific awning model, especially for motorized systems.
Tools and Materials: Wrench, drill, mounting hardware, sealant.
Installation Steps:
Safety Considerations: Use a level to ensure proper alignment and avoid over-tightening bolts, which could damage the RV’s exterior.
Cleaning and Inspection: Regularly clean the topper and brackets with mild soap and water. Inspect for signs of wear, rust, or loose fittings.
Lubrication: Apply lubricants to moving parts to maintain smooth operation and prevent corrosion.
Repair and Replacement: Check for tears in the topper fabric or bent brackets and replace them as necessary to maintain structural integrity.
Investing in quality camper slide out toppers and camper awning brackets can significantly extend the lifespan of your RV’s exterior and enhance its overall functionality. By choosing the right type, ensuring proper installation, and maintaining them regularly, you can protect your investment and enjoy a more comfortable and worry-free RV experience.
Read More: The Ultimate Guide to Camper Awning Canopies and Camper Hard Awnings
Get in Touch with Us!
Are you ready to take your RV camping experience to the next level? At NATURE AWNING, we specialize in crafting premium RV awnings that combine durability, ease of use, and stylish design to create the perfect outdoor living space. Whether you're planning a weekend getaway or a long-term road trip, our awnings provide the shade and comfort you need to enjoy every moment.